

STAINING A LARGE BUILT-IN
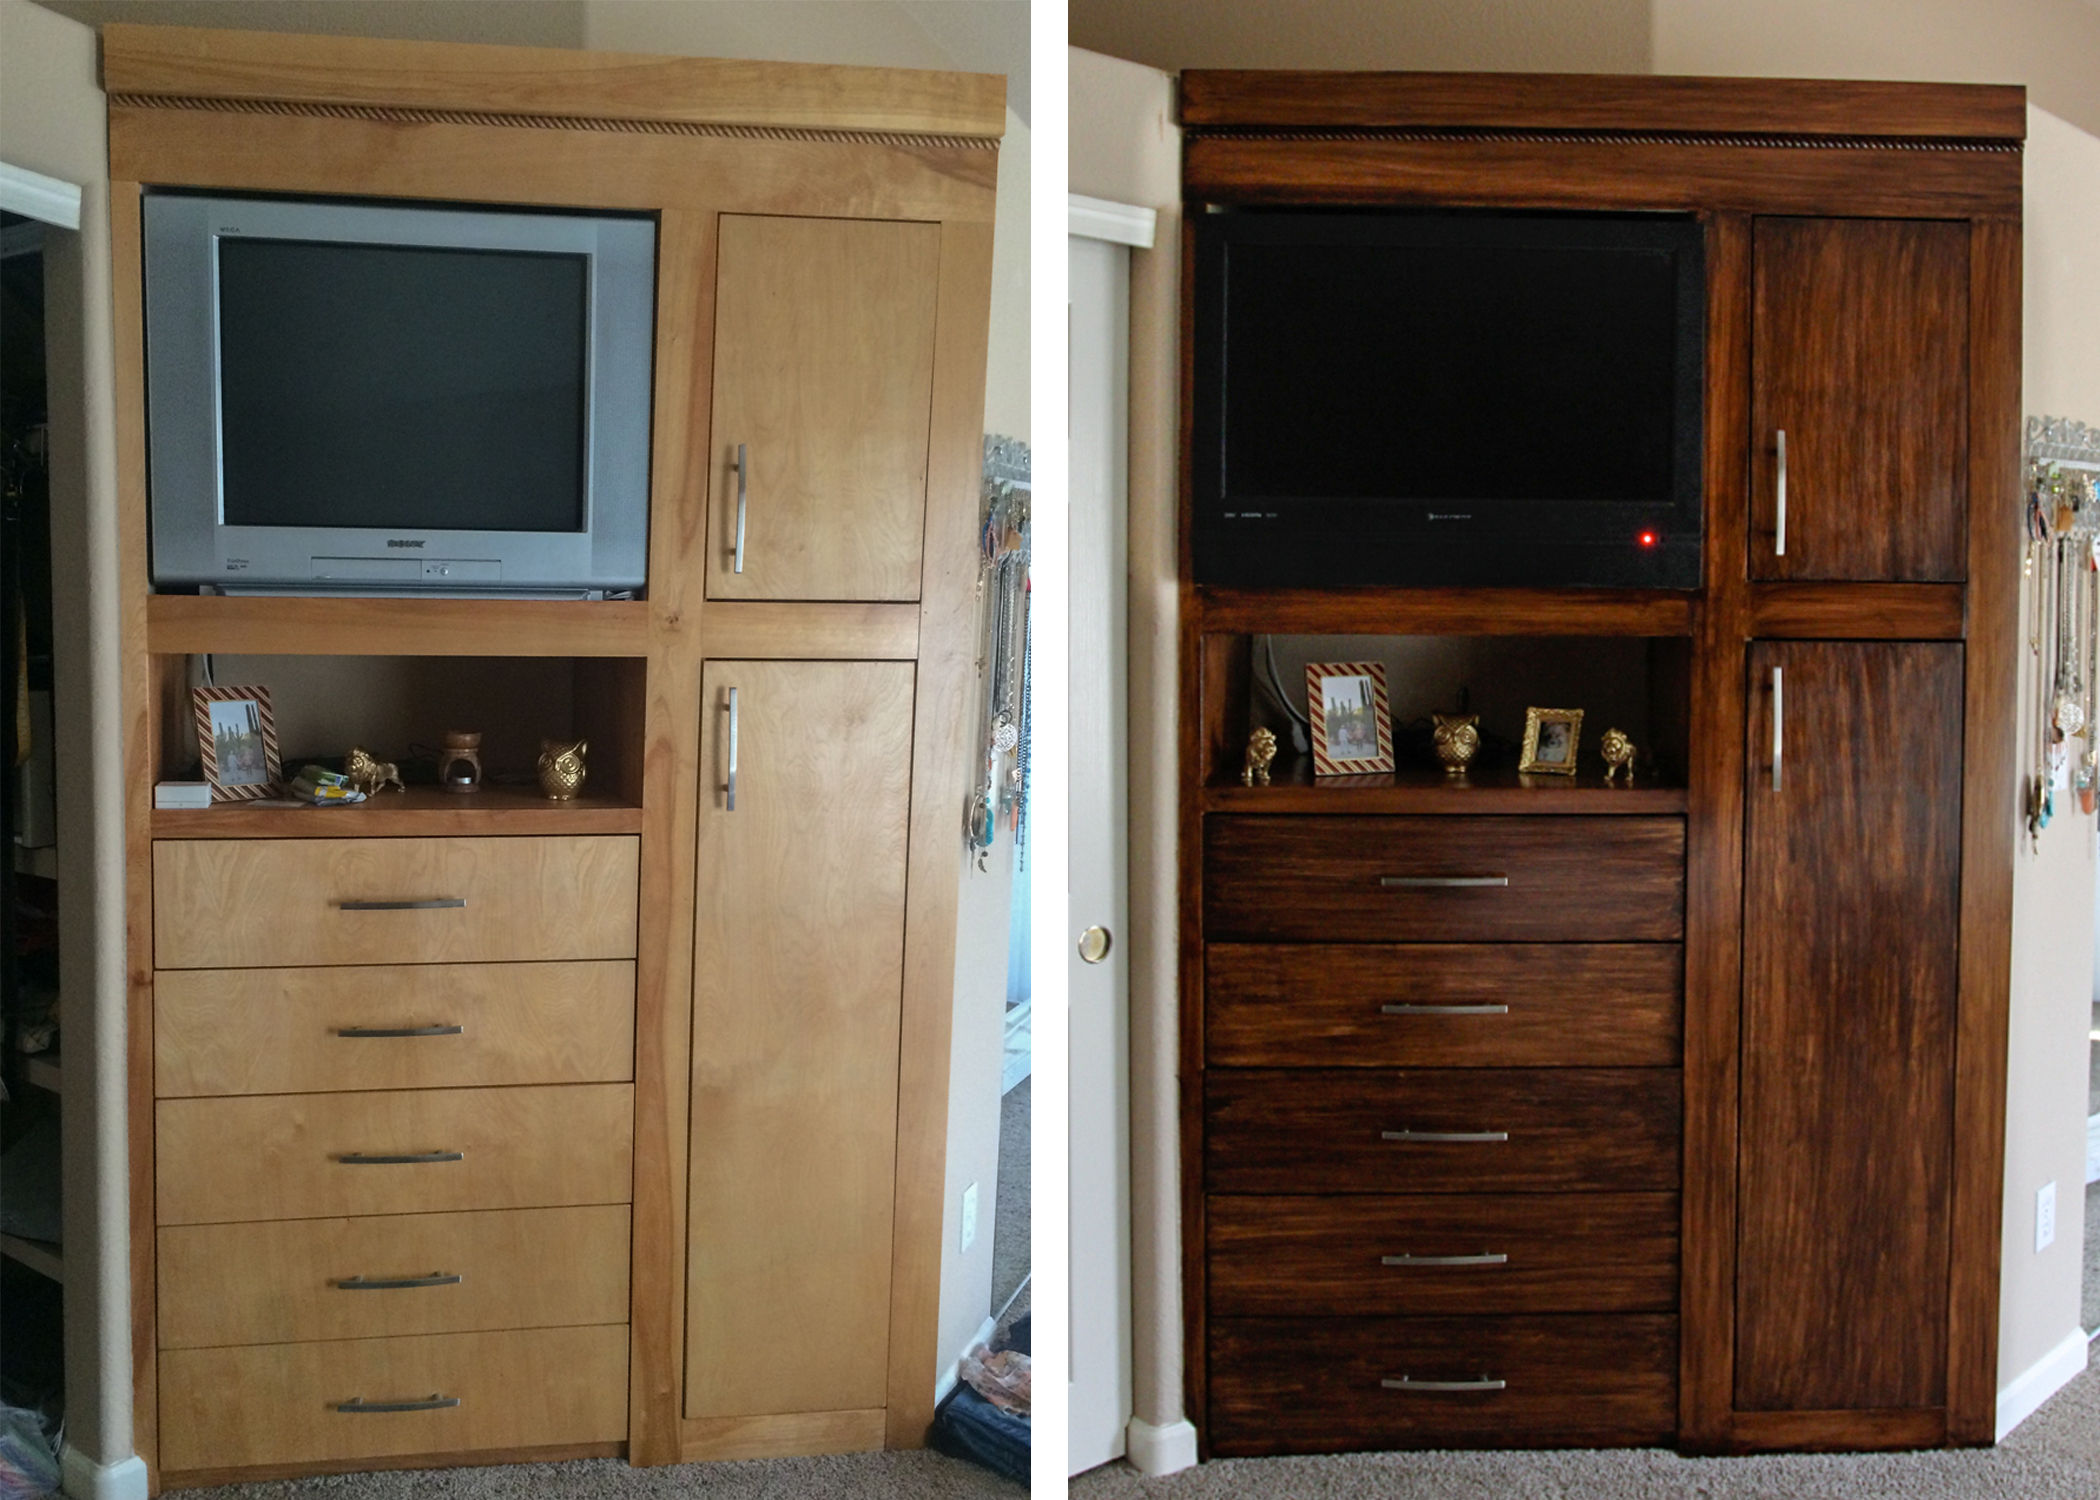
Taking on a staining job for a large piece of furniture can be a big task. Especially if you’re inexperienced like myself, & if it’s a “permanent” piece like a built-in. The owners before us did a lot of work on the house to make it more custom. As in my dining room post before, I mentioned that the dining room used the be the master bedroom walk-in closet. I love that decision they made, but it meant no walk-in closet in our bedroom. To compensate, they built a his & her closet with a large built-in dresser/tv stand.
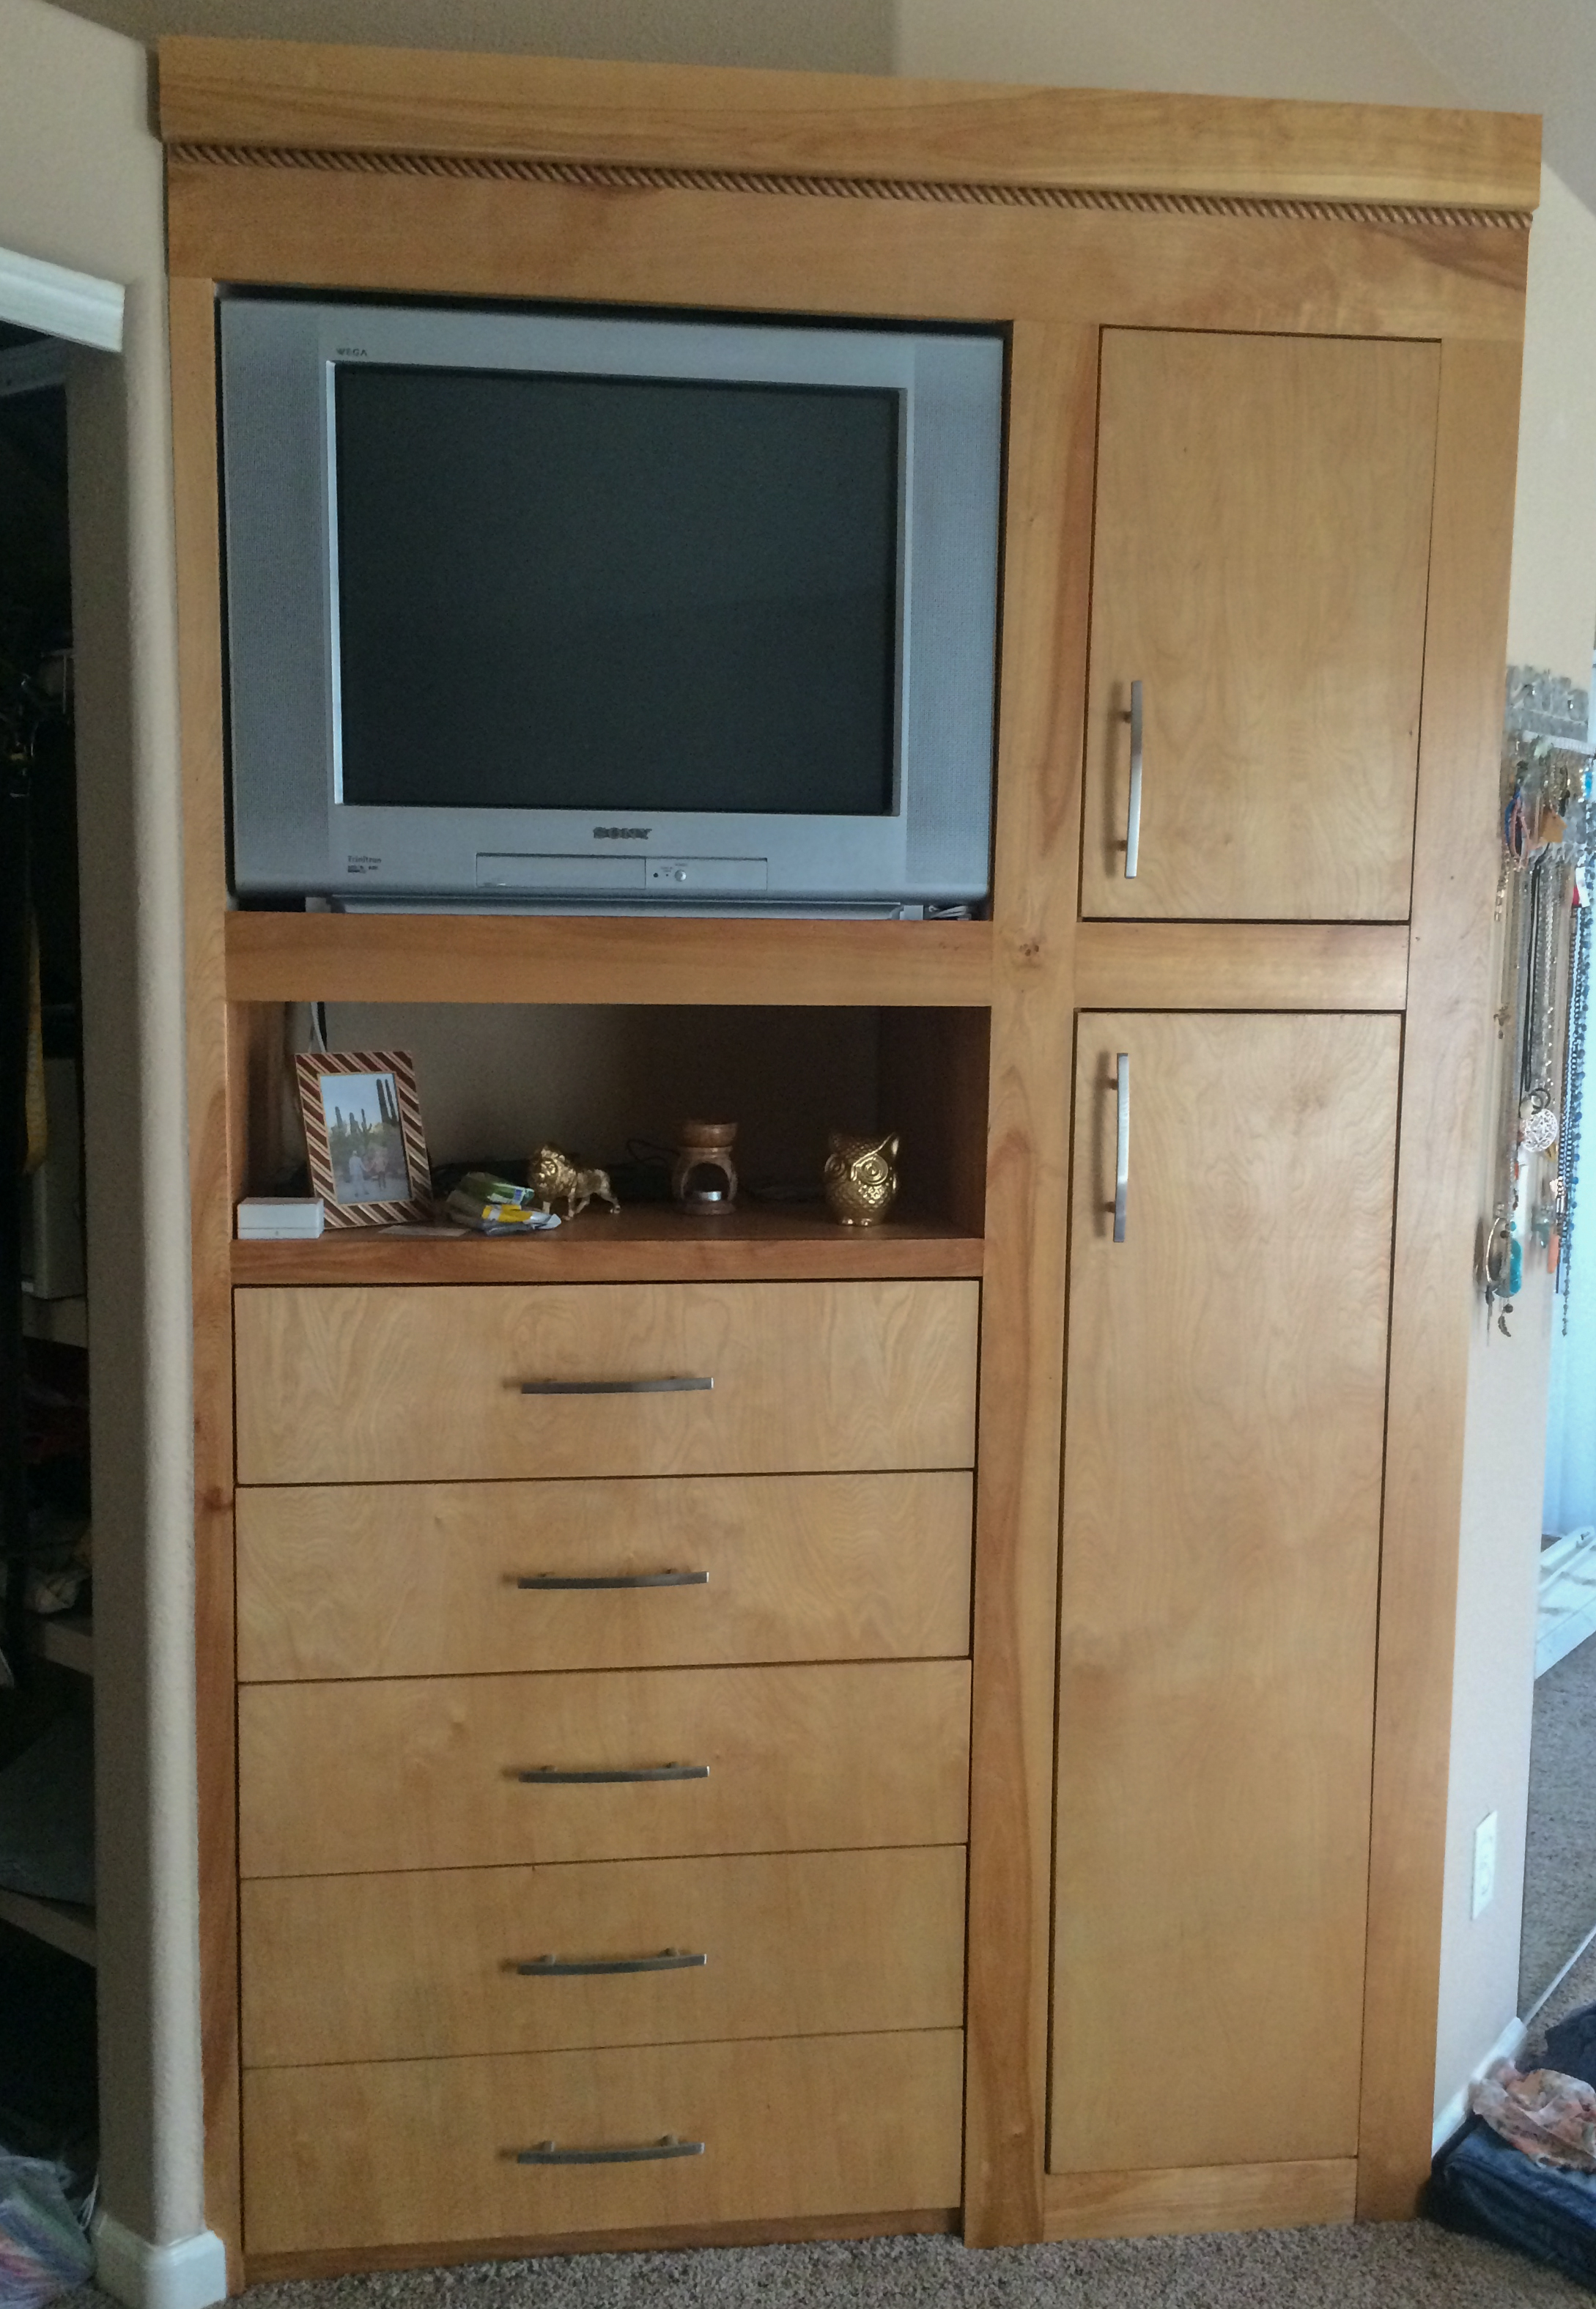
The smaller closet is on the left & the larger is on the right. With the amount of room in the drawers on the built-in & with the separate closets, it provides ample space for our stuff. For this reason, we wanted to keep the built-in, but we made plans to stain it later down the road. Last weekend we decided to get it stained before it started getting hot outside. Like over 100 degrees hot. We also wanted to take out the box TV (which the previous owners kindly left for us) & put in our old TV which wasn’t being used at all. Because the built-in was custom built, it perfectly fit the box TV, but was just a bit small for our TV. My husband, being a “just get it done” type of guy, decided to play around with how to secure our TV in that tiny space. It’s hard to explain, but he attached wire from the back of the TV to screwed in hooks on the back wall. It hangs off of the shelf a bit, so it’s like a floating TV! At first I was worried, but I check it every day to make sure it’s still secure. ;) Great job babe!!
Here are the simple steps to staining:
1 // take apart furniture as much as possible – mostly the drawers & doors were taken off, but the rest was secured into the wall
2 // sand the wood down with a 220 grit sandpaper & orbital sander – I like the orbital sander because it’s so easy to use & not too powerful for a small person like me
 3 // wipe off the dust with a tack cloth
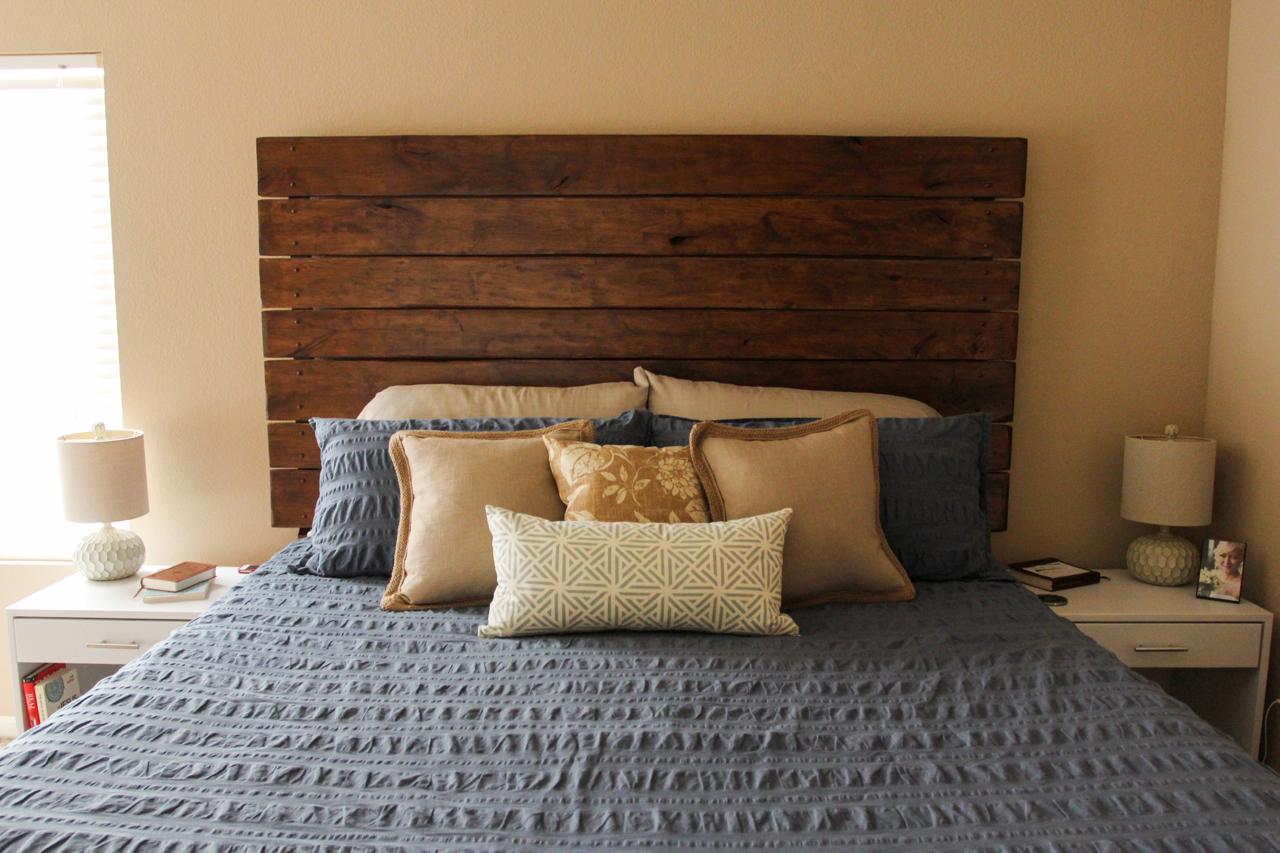
4 // add the first layer of stain with a cheesecloth or sponge – I like the cheesecloth a lot – rub the stain all over, then, in large strokes, wipe away the excess stain in the direction you want the grain – different woods make for different applications; the alder wood we used for our headboard here was sooooo easy to stain – it only required one coat of stain & looked perfect. On the other hand, whatever wood is on our built-in took 3 coats of stain & was harder to apply. If this happens to you, keep with it, add more coats, & it’ll turn out better than you think!
5 // sand the wood in between each coat of stain & wipe down with a tack cloth again – add as many coats as you want – stains are buildable
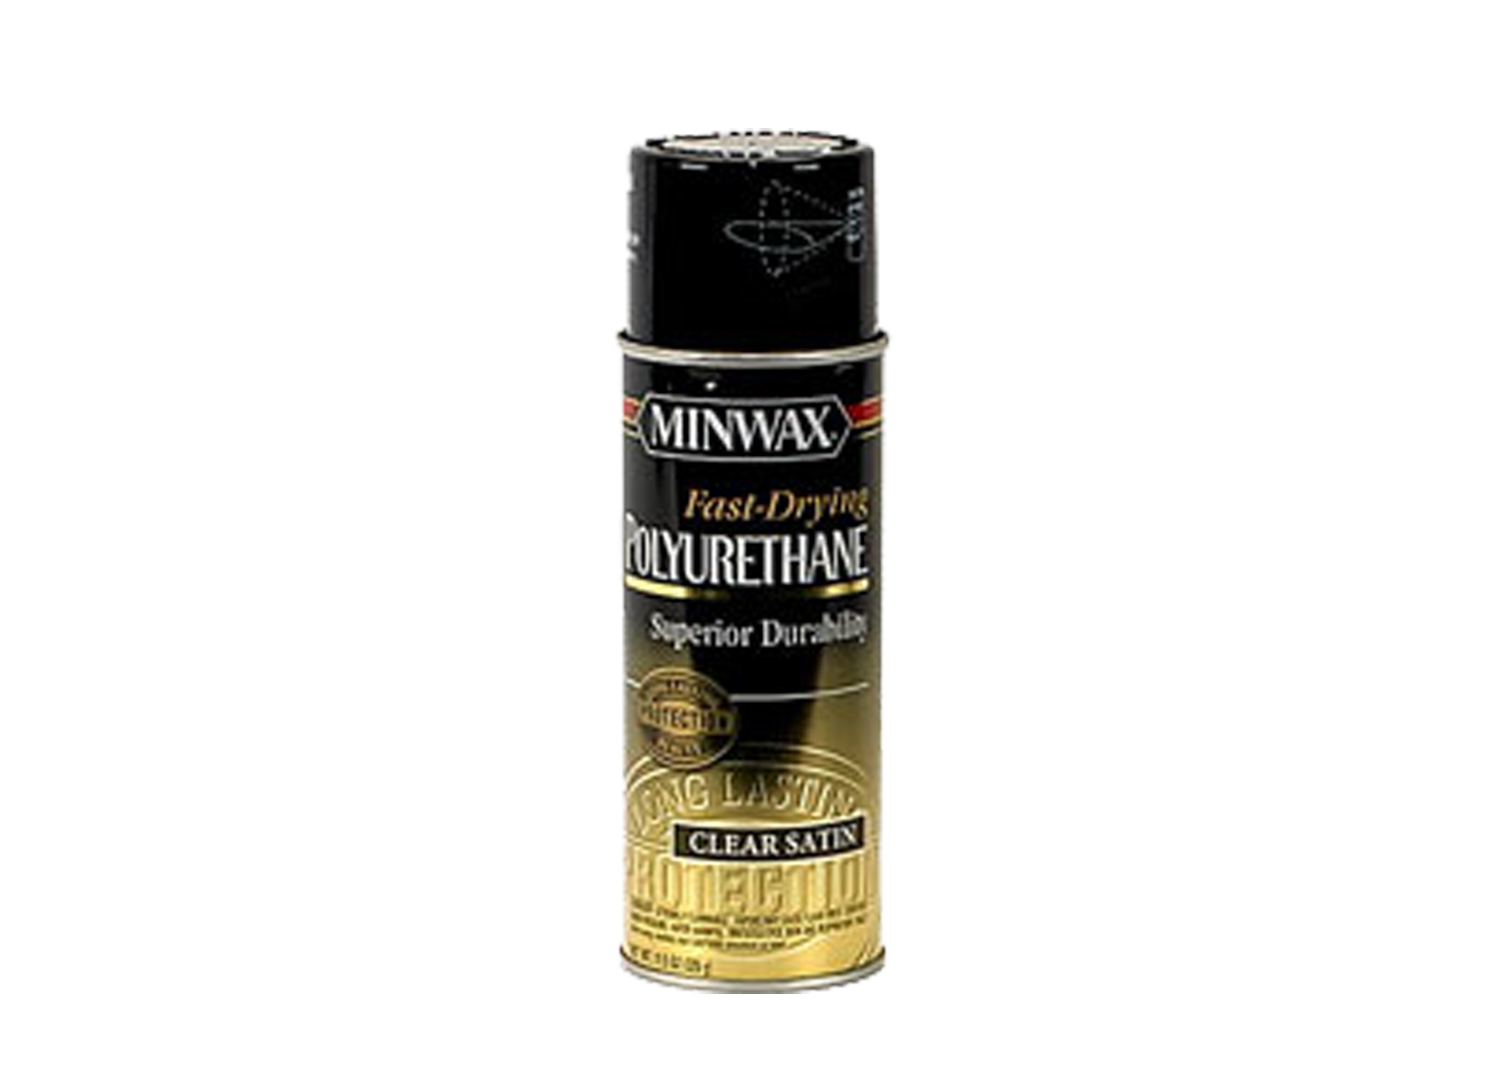
6 // finish with a couple coats of Polyurethane – we had both a dip can & spray can – either way, get a natural bristle brush to apply a thin coat for each layer (if using the spray, spray directly on furniture then finish with the brush for even coats)
Some other things to keep in mind when staining inside:
- Keep windows & doors open with lots of airflow, especially when using Polyurethane as it is very strong stuff & should not be ingested
- Tape your carpet or walls around the built-in to keep stain off the walls
- When you’re all done, if you need some touch ups in small spaces, grab a paper towel & stain small areas with it – the paper towel helped me get into small crevices that the cheesecloth was too thick for, & also for getting close to the carpet
- Wear gloves if you can – stain is hard to get off skin
- Use Mineral Spirits to clean your brush & hands if you got stain on them – do this outside & make sure to wash your hands with soap & water after
I hope I covered everything for you to start your own staining project! Be patient, don’t skip steps, & try to have fun with it!! I’m so happy with how ours turned out even though I thought it looked terrible when we were in the middle of staining.
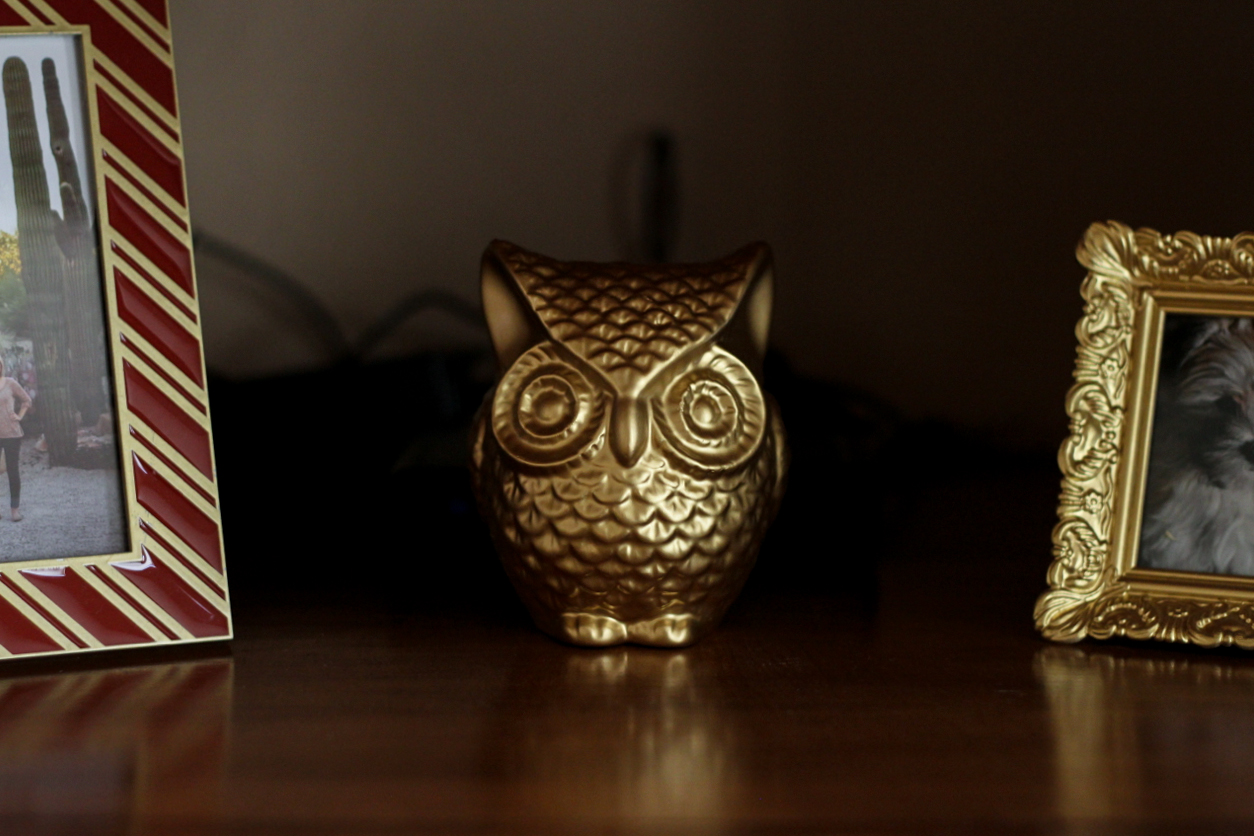
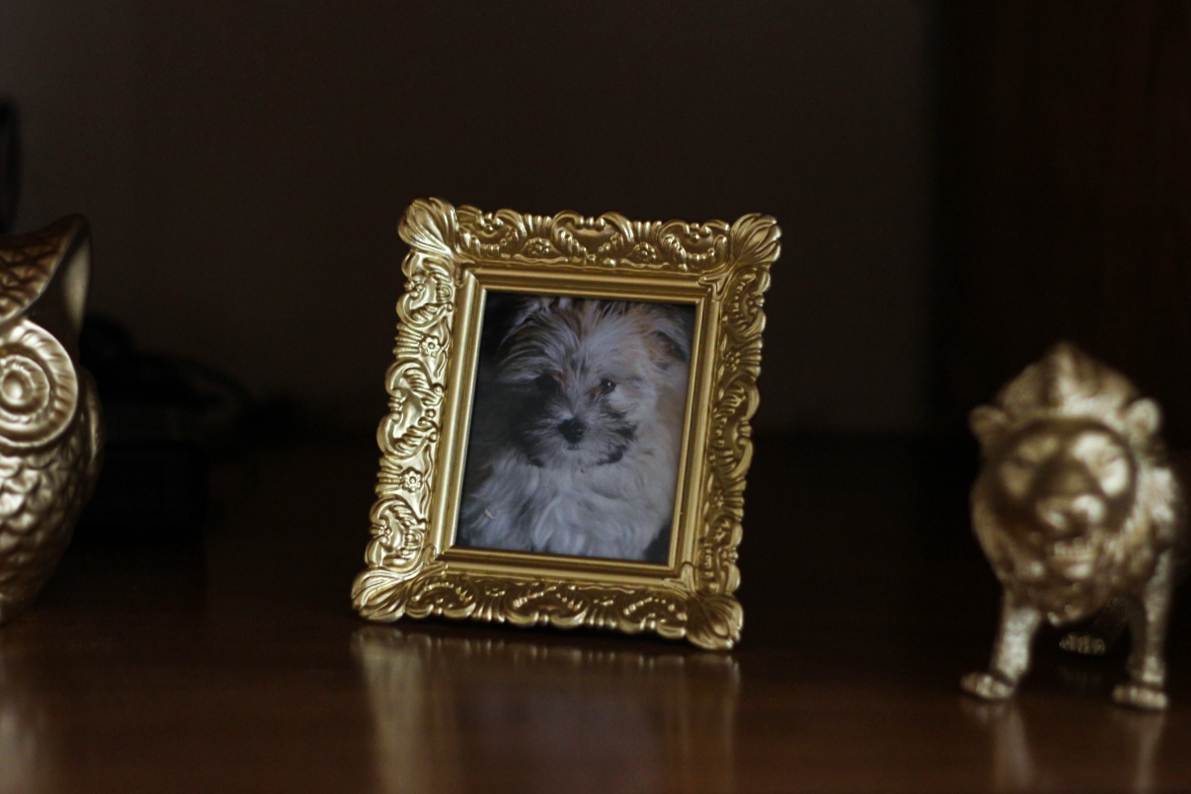
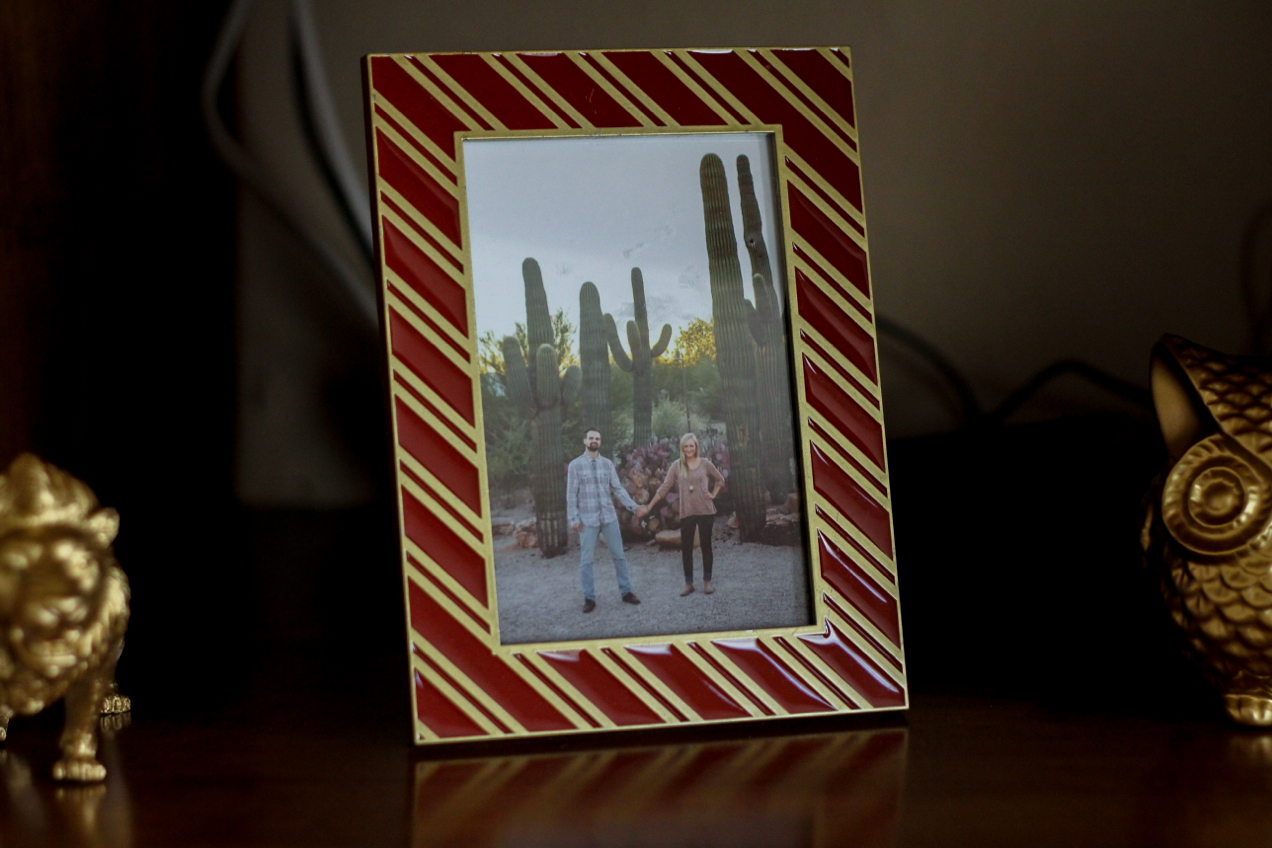
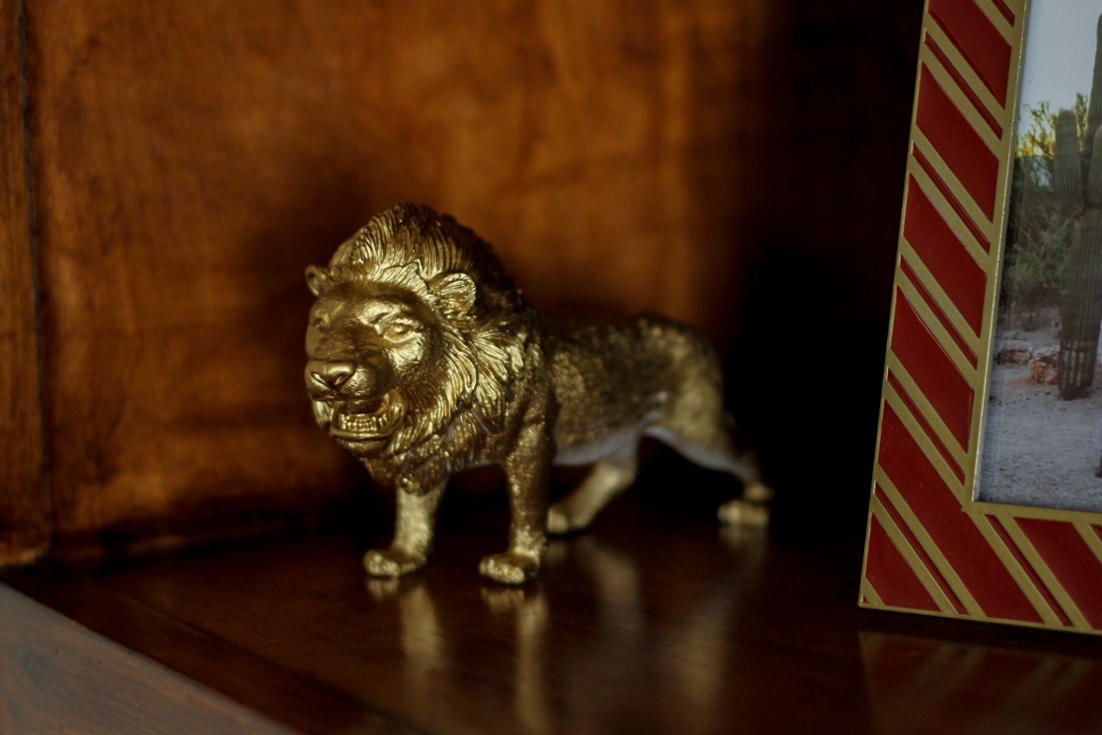
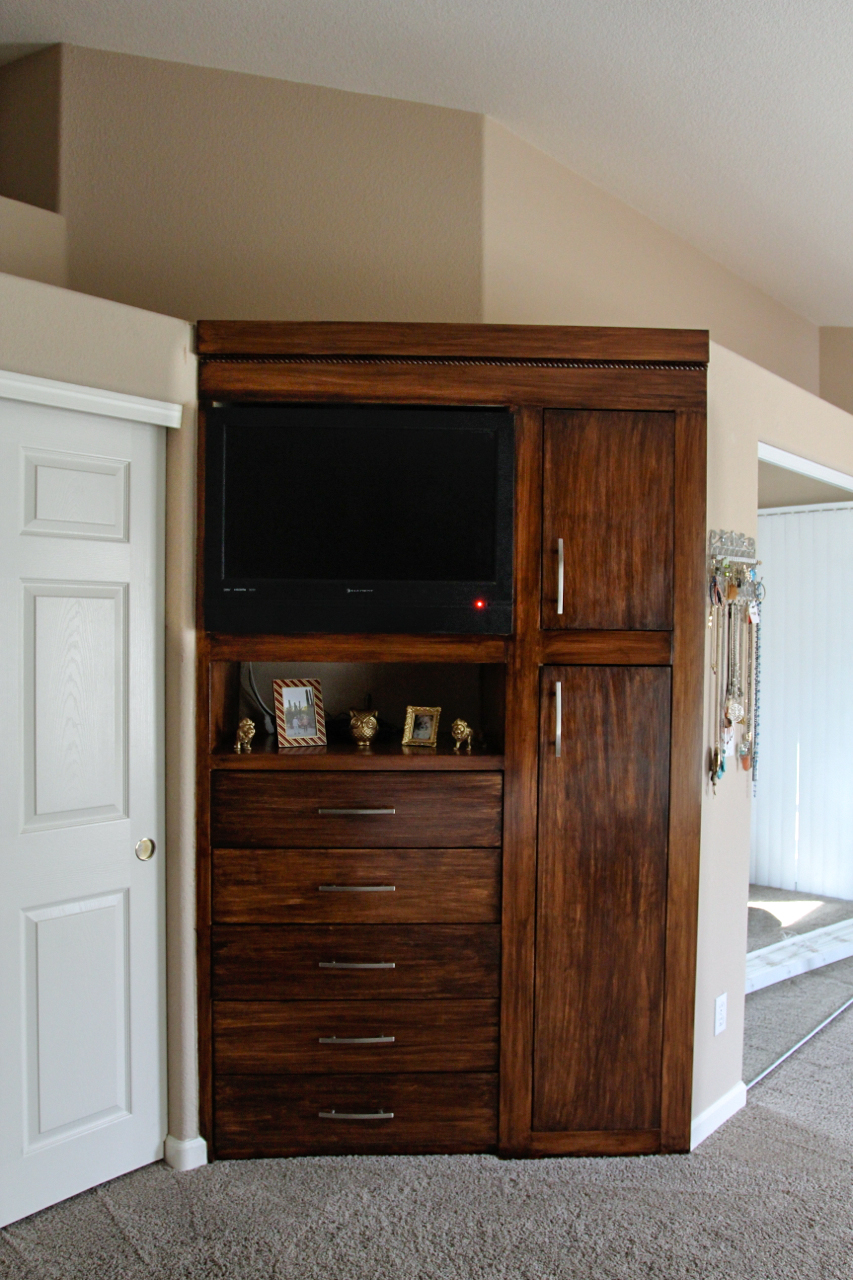 When we were on the first coat of stain, I was thinking “this is not working!” It was streaky & very light. My husband was positive the whole time & kept me going. I’m so glad he did because I LOVE it! I also am obsessed with gold, so I added some cheap DIY gold spray painted pieces to the top. I love the gold against the dark wood. Thinking about possibly also spray painting the handles gold, what do you think? The lions were $1 toys from Walmart, the owl was 99 cents from the 99 Cent store, the small frame was a gift, & the red frame is a Nate Berkus frame that was on sale at Target!
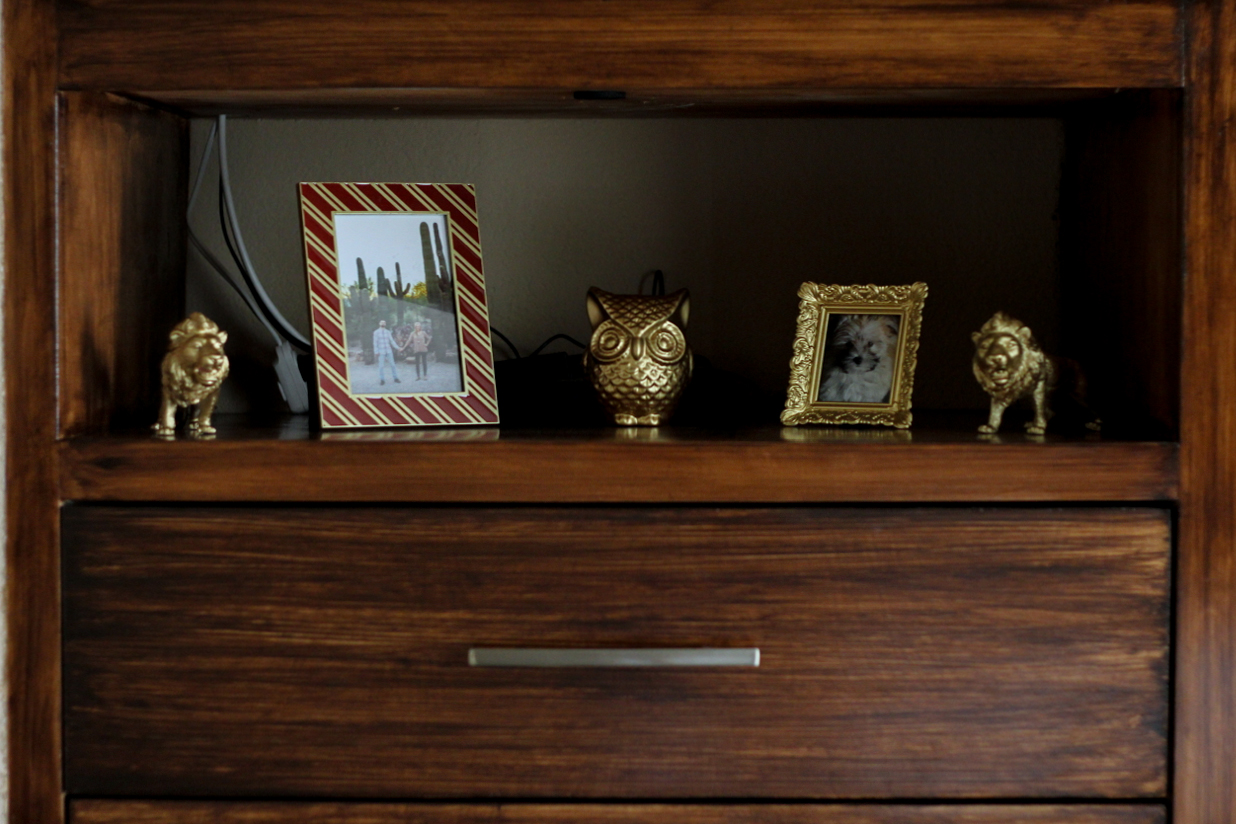
We used the same stain color on this as we used on our headboard so they match perfectly! This little change makes a big impact in our room.

Nice choice of stain color, and well done on the process. I give anyone extra points that stains built-in furniture without staining the tile, carpet or walls in the process. It’s not an easy job. Beautiful work, Bethany. Kudos to both of you!
I would also like to see a photo of your headboard. (Am I being pushy? I love wood work!)
Thank you so much! Keeping the stain off the carpet & walls was definitely a challenge. :) Here is the link to see our headboard: https://www.chasingtumbleweed.com/?p=1919
I had forgotten what it looked like. Nice job.
Love it!!! I’m wrapping up a master bedroom stain project and appreciate the tack cloth/cheesecloth info. WOW smooth. I had my doubts when we first started on dresser too. So much that I resanded them and started over. Wish I would have had a little faith because that took the fun out of it. Second time around and still questioning what had I got myself into. I decided to keep on going and found in the end the imperfection are what really makes the furniture beautiful. Headboard time and I know it’s going to koo amazing when done. First time stain project: SUCCESS!
Thank you! I’m so glad I had my husband to push me to keep going! Bummer you had doubts too. I’m glad yours finally turned out great!
I absolutely loveee it!!! it made it look so expensive like its a whole new piece!:) definitely gave me inspiration for these shelfs I’ve been making for an outside closet in my room. I have 4 and 5′ boards that I want to use a mahogany stain with polyurethane so almost match one bureau we do have. I was still unsure about quite a few things but you’ve actually covered every single thing! I bought a tack cloth, cheese cloth and one each of what I thought I might need. just wasn’t sure how to use them to get them dark like your built in!
Thank you so much! I’m so glad I could help. I wish I knew more, but you really learn to most by just doing it. Have fun with your project!